
How to Increase Storage on Your Raspberry Pi
Published by dtrain,
How to Increase Storage on Your Raspberry Pi
Most people run a Raspberry Pi with just an 8GB SD card. But is this really enough? What if you needed more space? Here’s how to make more space on Raspbian by removing unwanted packages, or simply adding storage.
Use a Bigger microSD Card
The first option you should consider for extra space on your Raspberry Pi is a bigger SD card.
While 8GB is currently the most common size of microSD card for Pi operating systems, larger options are available. You’ll even find a few Pi-compatible distros that can fit on smaller-capacity SD cards.
Once you have your operating system installed, however, all you have left to play with is the rest of the card. This might be okay if you have a 64GB card, but it’s bordeline useless if you’ve squeezed your Raspberry Pi’s OS onto a 4GB card.
But even if you are using a larger card, space may prove to be an issue. This is because writing the disk image to your microSD card creates a partition. The result is that the rest of the disk is unusable unless you expand the file system. Fortunately, this is simple to do if you’re using a Raspbian (or Raspbian-based) OS.
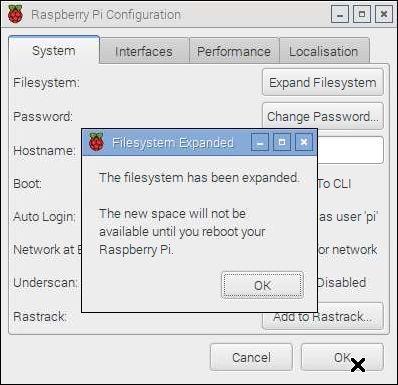
In the Raspbian desktop, open the menu and find Preferences > Raspberry Pi Configuration. The first option on the System tab is Expand Filesystem. Click this, then wait a moment. You should soon see a confirmation box, so click OK. Note the warning: “The new space will not be available until you reboot your Raspberry Pi." To take advantage of the full storage of your SD card, reboot.
If you prefer to use the command line, meanwhile, enter:
sudo raspi-configIn the resulting menu, select Expand Filesystem.
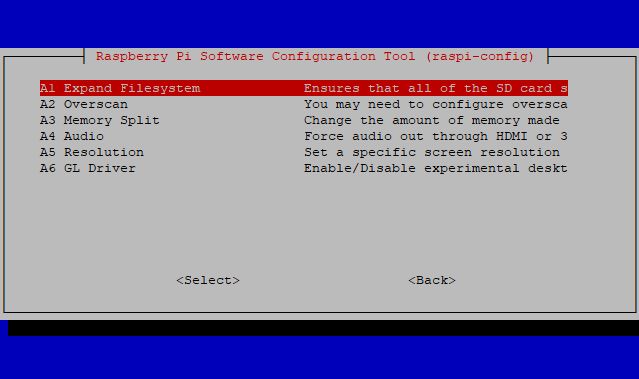
Confirm the choice, then wait. You’ll soon see a message informing you that the “Root partition has been resized." After rebooting, the filesystem will be expanded to fill the partition, giving you the full benefit of the SD card’s storage.
Connect USB Storage to Your Raspberry Pi
Another option to make more space on your Raspberry Pi is to add USB storage. This is particularly useful if you’re running a Raspberry Pi 3, as it’s also possible to install the operating system to USB.
How to Make Raspberry Pi 3 Boot From USB How to Make Raspberry Pi 3 Boot From USB The Raspberry Pi is a versatile piece of kit, capable of a diverse range of tasks. But it has one glaring flaw: the inability to boot from USB. Until now, that is. Read More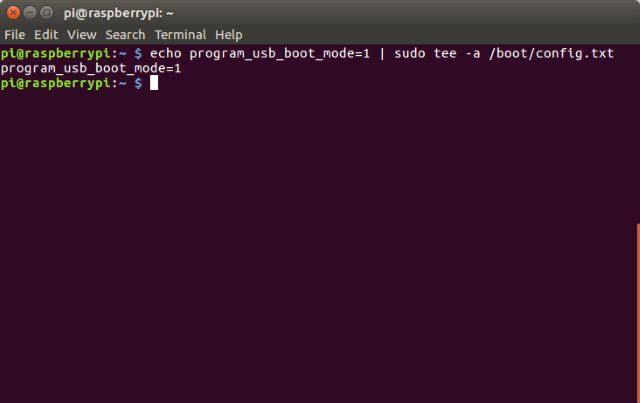
While expanding the filesystem is recommended regardless of your microSD card’s capacity, embracing the possibilities of USB storage will ensure you never run out of space for your projects. USB ports on the Raspberry Pi are limited to USB 2.0 (even on the Raspberry Pi 3B+), but USB 3.0 devices can still be used—they’ll just be limited to USB 2.0 speeds.
How to Decide If You Need the New Raspberry Pi 3 B+ Model How to Decide If You Need the New Raspberry Pi 3 B+ Model The new Raspberry Pi 3 B+ has been released. How much does it cost, what hard specification does it have, and will it improve your existing projects? We've got answers. Read More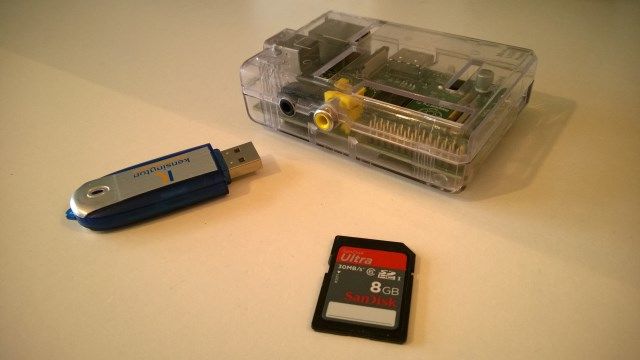
USB storage options for the Raspberry Pi are straightforward. It might be a compact thumb drive with flash memory, or an external hard disk drive. You might, however, prefer to connect something faster like a solid state drive, although these are less durable. You might even fancy connecting a USB DVD drive to your Raspberry Pi!
Whatever you decide, just make sure the external device is receiving its own power supply. The limits of the Raspberry Pi mean that while it might be powerful enough for a USB thumb drive, it won’t be able to independently handle a DVD drive or HDD, so they’ll need their own power.
Switch to a Lightweight Linux Distro
The smaller the operating system, the more space you’ll have on your Raspberry Pi. So it makes sense to opt for a distro (or some other Raspberry Pi-friendly OS) that is designed to take up as little space as possible.
While several compact Linux distributions are available for desktops, things are a bit different for the Raspberry Pi. The choice is smaller, and probably starts with Raspbian Lite. This is a smaller version of the main Raspbian OS, with much of the software removed. While the main Raspbian Stretch distro is over 4GB to download, Raspbian Stretch Lite is just 1.2GB.
Other options are available, such as DietPi, which is based on Debian Jessie, and piCore, a Pi-centric version of the popular Tiny Core Linux distro. Our full list of lightweight distros for the Raspberry Pi will give you more information here. You might also consider non-Linux operating systems if space is a particular worry. RISC OS is an older operating system that is particularly apt for installation on the Raspberry Pi.
6 Lightweight Operating Systems for Your Raspberry Pi 6 Lightweight Operating Systems for Your Raspberry Pi Need to squeeze some extra processing power out of your Raspberry Pi? You should try a lightweight operating system. These examples will get you started. Read MoreRemove Packages to Make Space in Raspbian
If you don’t want to switch distros, have a good Raspberry Pi system up and running, and don’t have any USB storage, you have another option. It’s a little more involved, however, and means uninstalling software that you don’t plan to use.
To check how much space if being used on your SD card, use the df command:
df -hThe output will display how much is used and available, with the heading /dev/root. You can probably make more space, so find out what you can remove with:
dpkg --get-selectionsOr:
dpkg --get-selections > packages.txtThis second option will send the results of –get-selections to a text file that you can easily browse. Open packages.txt to see what is currently installed. Next, find out what packages are taking up the most space:
dpkg-query -Wf '${Installed-Size}\t${Package}\n' | sort -nThe aim now is to cross reference this list with the one you already made. Where the large items cross-match with those that you don’t use, you’ve found data you can remove. Do this with the purge command.
sudo apt purge -y [packagename]Repeat this for everything you don’t need, replacing [packagename] with the name of the package you’re removing. Once you’ve deleted everything you don’t want, use the autoremove command to discard of any unused prerequisites. Follow this with the clean command to tidy any locally-stored packages.
sudo apt autoremove
sudo apt clean
No Need to Ever Run Out of Storage on Raspberry Pi
As you can see, there’s no need to be limited by space on your Raspberry Pi. You have four ways to make additional storage space:
- Expand the filesystem.
- Connect USB storage (hard disk drive, SSD, etc).
- Switch to a lightweight distro like Raspbian Lite or PiCore.
- Remove packages to make space on an existing Raspbian install.
With so many ways to make the most of your existing and additional storage, there’s no way you’ll ever run out of space on your Raspberry Pi again! Now you can go ahead with your Raspberry Pi projects, like turning your Raspberry Pi into a home media center.
Raspberry Pi Media Center: How to Install Kodi on Raspbian Raspberry Pi Media Center: How to Install Kodi on Raspbian If you want to turn your Raspberry Pi into a media center but you only have one microSD card, installing Kodi on Raspbian is the way to go. Read MoreEnjoyed this article? Stay informed by joining our newsletter!